
December 5, 2023
•Last updated December 6, 2023
Let’s Build: A Supplement Stack Sharing App with Ruby on Rails
Welcome to my latest Let’s Build series, where we'll build a supplement stack sharing app using Ruby on Rails.
Over time, I’ve added several these builds, which resonate with many of my audience.
These are both useful for first principles product ideas but also lovely ways to practice to see how quickly I can build an MVP of product ideas. Luckily, with Rails, this can be done quickly with just one developer.
The Idea
The idea for a supplement stack shopping and sharing tool (I'm dubbing Supstacker) came to me while browsing Twitter (X) one evening. I saw someone I followed to share a photo of over a dozen supplement bottles and proceeded to make a thread documenting each. While this was useful, places like X (formerly Twitter) are more of a “point in time” type of experience rather than something to refer back to often.
I read the thread and quickly realized that sharing any collection of supplements you might take with friends is hard. You can go one by one, but a list over, say, five supplements and things quickly get disorganized.
Plans following the build
As a disclaimer, I like this idea and plan to make it real. I’ll share the source code with y’all for reference, but don’t copy me directly if you plan to try to do the same.
When I build ideas like this, it's two-fold. To make helpful stuff people find value in and also benefit monetarily. That will be no different this time around. I suppose it’s fun to build this stuff, too, so I can’t leave that out. Do you want to build together to go faster? Reach out to me, and we can see what might make sense.
Pre-requisites
I’ll be using the latest version of Rails at the time of this writing/recording, which is Rails 7.1. We’ll leverage the Hotwire framework of frameworks and all the goodies that come with it.
Tailwind CSS is my go-to for CSS these days, and as a bonus, I’ll make use of the alpha version of my new project Rails UI to save some initial time on design.
P.S. If you need design work tailored for Rails apps, I’m available for hire.
Let’s get on with it!
Video version of the series
Part 1
Part 2
Part 3
Part 4
Part 5
Part 6
Part 7
Part 8
Part 9 - Final Part
Written version of the series
Getting started
I’ll start making a new Rails app on my machine using Rails 7.1 and Ruby 3.2.2. The app is a vanilla Rails app to begin with. I’m going this route since Rails UI plays more excellently alongside it.
rails new supstacker
After scaffolding the app, install Rails UI. You can totally not use Rails UI and customize your app a bit more. I’m using it to save some configuration time and design setup.
bundle add railsui --github getrailsui/railsui --branch main
After installing the gem, run.
bundle install
Finally, run the Rails UI installer.
rails railsui:install
That should fetch some dependencies and tweak the app. It also installs and configures Devise for you.
Boot your app and head to the root path (localhost:3000). You can then configure your Rails UI installation by choosing an app name, support email, CSS framework, and theme for the chosen CSS framework.
Saving your changes installs the framework and completes your configuration. With Rails UI installed, you now have a design system, an archive of opt-in pages, and more in your arsenal.
Generating resources
I’m calling this app Supstacker. It’s kinda catchy and the domain was also available💪!
We’ll use the term Stack as our first model, the collections of supplements. Additionally, we can use Product as another model to be what gets added to a Stack and ultimately shared/interacted with by your friends or public folks.
Thanks to Rails UI, we already have a User model, so let's build our resource list as an exercise in planning:
User- The model responsible for an entity who might add supplements and share stacks.Stack- A category or collection type of resource that acts as a basket for your supplements. Users can have many stacks. A stack has a shareable link that users can send to each other for quick and easy access.Product- The singular supplement (product) shared inside a stack. This might have richer data like pricing trends, title, description, and nutrition facts.Brand- The brand of a supplement. A Supplement would have one brand. A brand can have many supplements.
This is a short and sweet list to get us started.
As the app build gets underway, adding additional filterable criteria and categories might be an excellent way to help people browse. Some expansion ideas include tagging, categories (protein, weight management, vitamins/wellness, etc…), brands, reviews, ingredients, and more.
Quick setup
rails g scaffold Brand name description:text
rails g scaffold Product title:string description:text link:string asin:string 'price:decimal{10,2}' brand:references
rails g scaffold Stack title:string share_link:string user:references
rails g migration CreateProductStacks
class CreateProductStacks < ActiveRecord::Migration[6.0]
  def change
    create_table :product_stacks do |t|
      t.belongs_to :product, null: false, foreign_key: true
      t.belongs_to :stack, null: false, foreign_key: true

      t.timestamps
    end
  end
end
Defining relationships
We can move quickly thanks to ActiveRecord, which helps define relationships on the model level in Rails. I’ll list all the models below and explain what’s going on with each.
User Model
- A user
has_manystacks.- A user should be able to make more than one stack OR perhaps with business in mind, you might offer one free stack and add a payment gateway here to upsell and earn for the service.
- A user
has_manyproducts through stacks.- Being able to see all the products a user has would be awesome. With this relationship, we’re able to do so. We can query through all stacks a user has created and output the products.
# app/models/user.rb
class User < ApplicationRecord
  has_many :stacks
  has_many :products, through: :stacks
end
Stack Model
- A stack
belongs_toa user.- When a user creates a
Stack,it references theiruser_ideven if other users can view it. This is important to easily display user profile data on a view for others to understand whose stack it actually is.
- When a user creates a
- A stack
has_manyproducts.- Think of a Stack as a container of products and what we’ll allow users to share. We don’t want to limit the number of products, but requiring at least one product would make sense.
# app/models/stack.rb
class Stack < ApplicationRecord
  belongs_to :user
  has_many :product_stacks
  has_many :product, through :product_stacks
end
Product Model
- A product
has_manyaProductStacks - A product
has_manyaStacks - A product
belongs_toaBrand- Brands are similar to stacks but apply only to products. We’ll leverage this model to give users an easy way to filter their search for supplements and other users with products of the same brand (
brand_id) within their Stacks.
- Brands are similar to stacks but apply only to products. We’ll leverage this model to give users an easy way to filter their search for supplements and other users with products of the same brand (
# app/models/product.rb
class Product < ApplicationRecord
  belongs_to :brand
  has_many :product_stacks, dependent: :destroy
  has_many :stacks, through: :product_stacks
end
ProductStack model
- A
ProductStackbelongs_to aproduct - A
ProductStackbelongs_to astack- This join model allows us to retrieve products and stacks through one another more easily.
class ProductStack < ApplicationRecord
  belongs_to :product
  belongs_to :stack
end
Brand Model
- A brand
has_manyproducts - I added
dependent: :nullifyso we can delete a product but not necessarily the associated brand. You might see a foreign key constraint exception on the database layer if you don't do this.
# app/models/brand.rb
class Brand < ApplicationRecord
  has_many :products, dependent: :nullify
end
This set of relationships allows a user to have multiple stacks; each stack can contain multiple products, and each product belongs to a specific stack and brand.
If you’re following along, go ahead and amend your app to match the snippets above. We’ll refine the controllers and views coming up. Before we do, we need to enhance our routes.
Initial Routing
With our resources generated, we should have a couple of new lines in the config/routes.rb file that came with the app. If you're using Rails UI, your file should look similar to this:
# config/routes.rb

Rails.application.routes.draw do
  resources :stacks
  resources :products
  resources :brands
  if Rails.env.development? || Rails.env.test?
    mount Railsui::Engine, at: "/railsui"
  end

  # Inherits from Railsui::PageController#index
  # To overide, add your page#index view or change to a new root
  # Visit the start page for Rails UI any time at /railsui/start
  root action: :index, controller: "railsui/page"

  devise_for :users
  # Define your application routes per the DSL in https://guides.rubyonrails.org/routing.html

  # Reveal health status on /up that returns 200 if the app boots with no exceptions; otherwise, 500.
  # Can be used by load balancers and uptime monitors to verify that the app is live.
  get "up" => "rails/health#show", as: :rails_health_check

  # Defines the root path route ("/")
  # root "posts#index"
end
The root route points to the Rails UI engine by default. Let's change this to stacks#index for now.
# config/routes.rb

root to: "stacks#index"
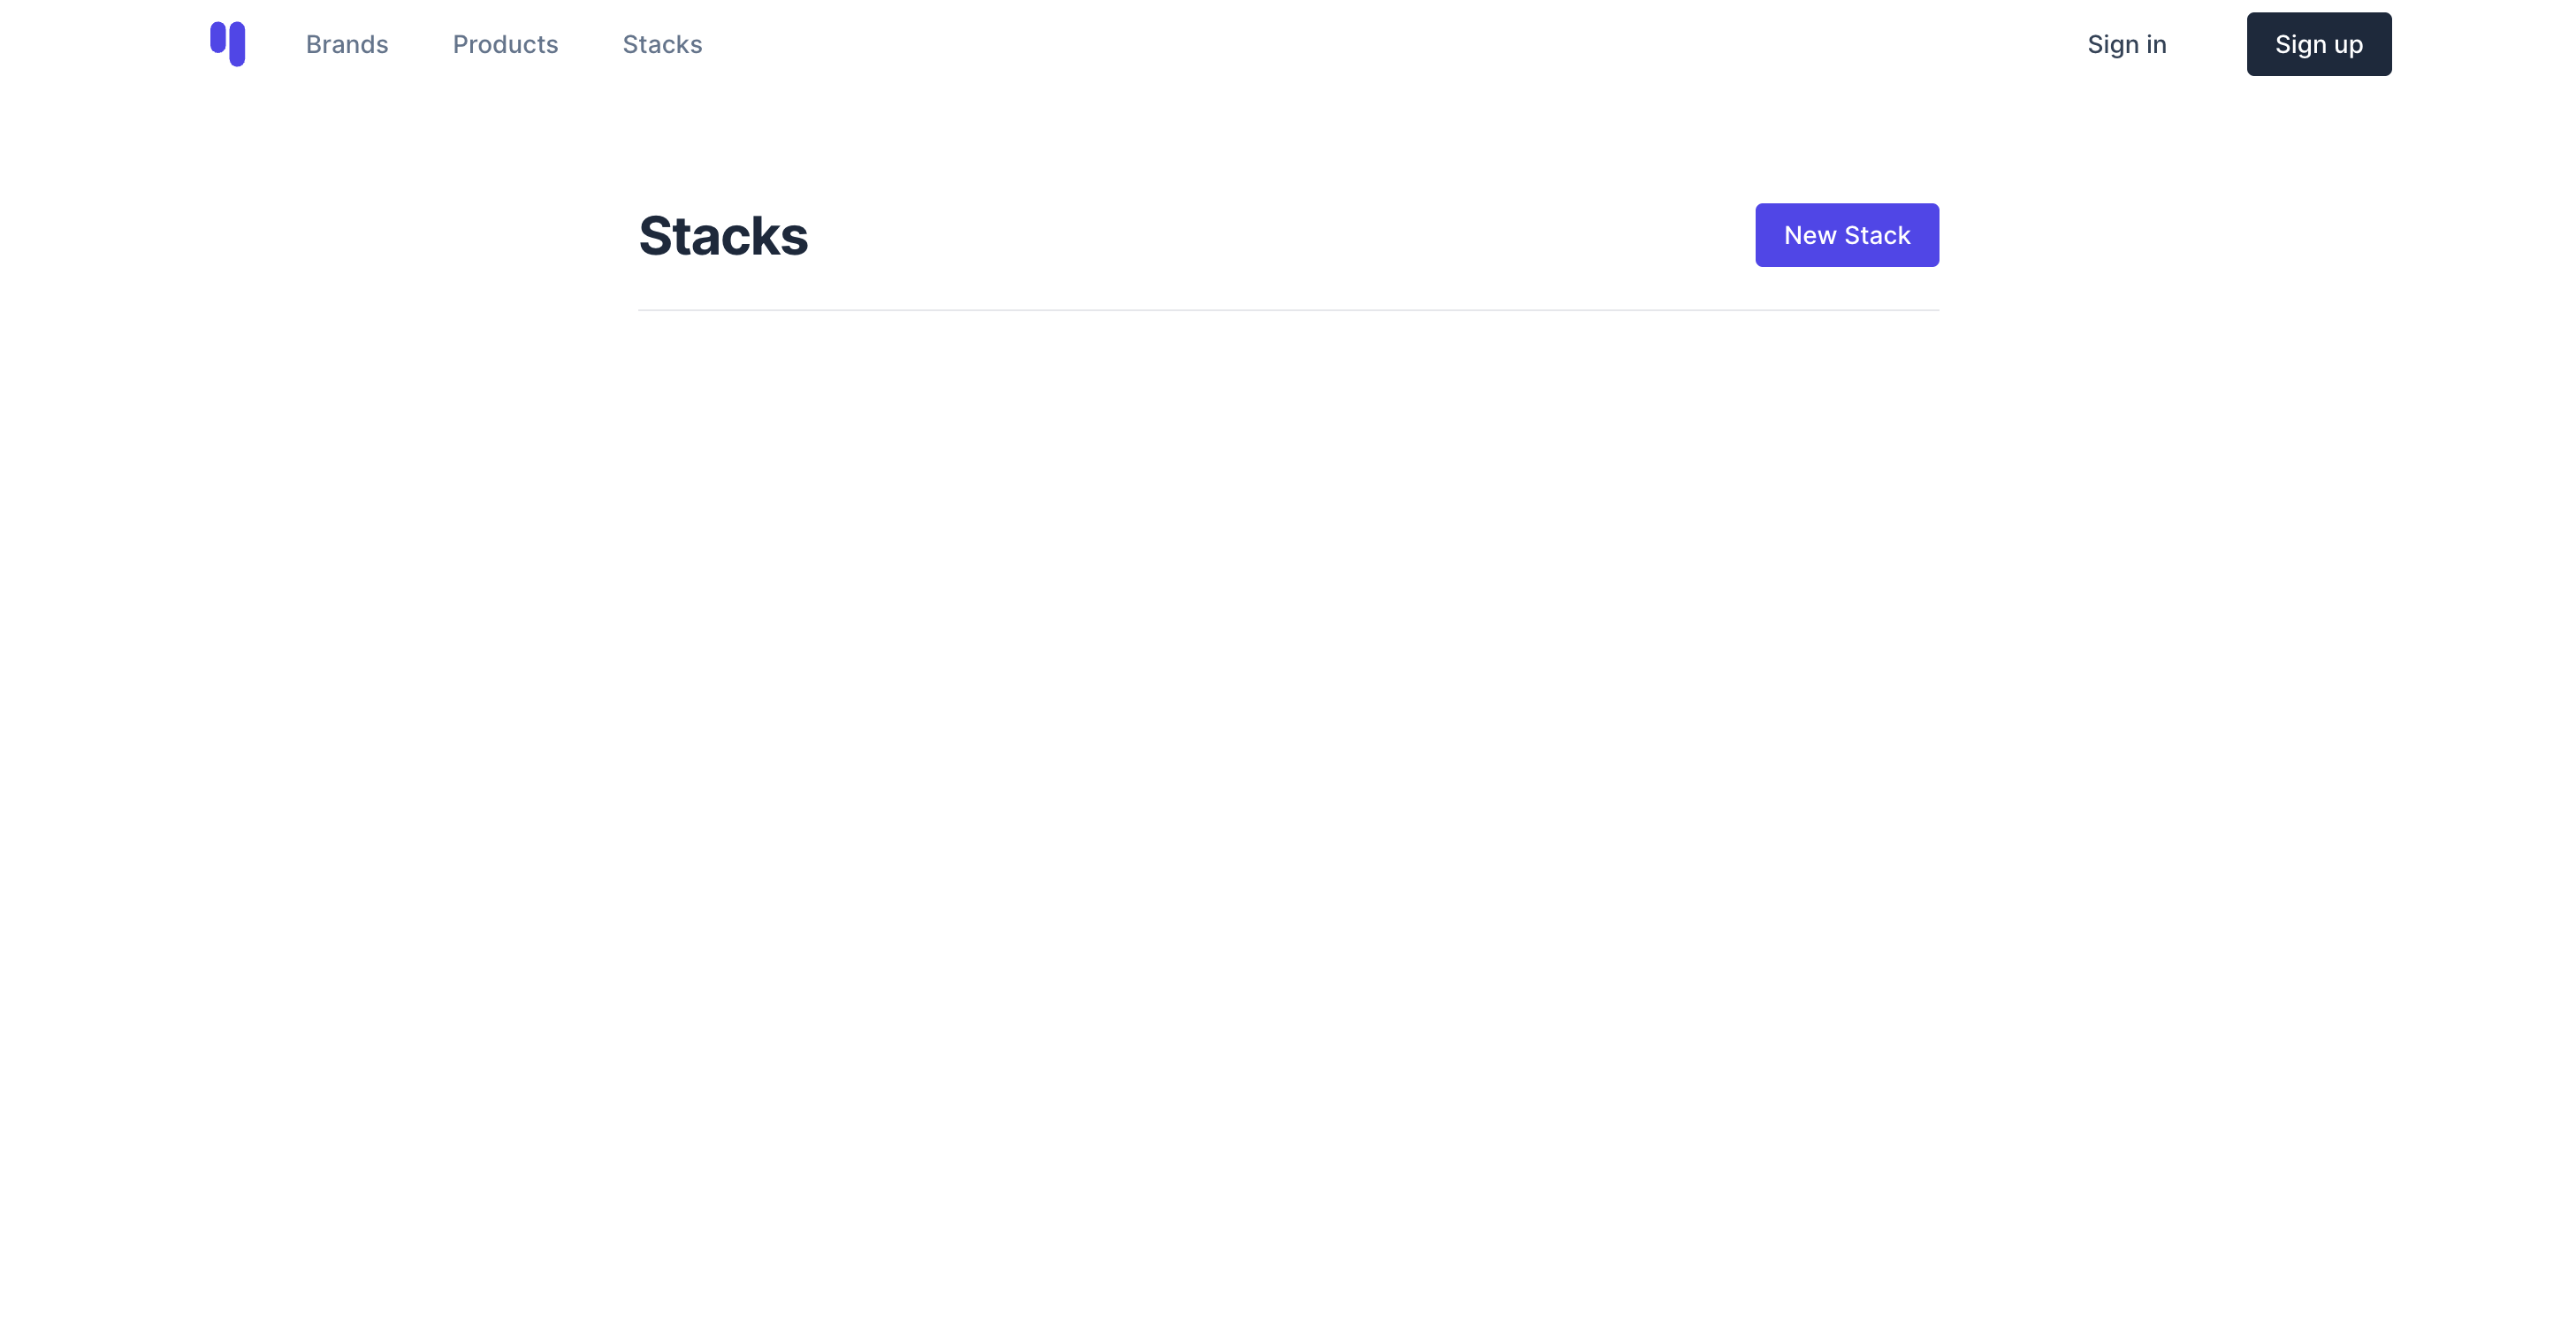
Head back to localhost:3000, and you should see the Rails UI theme we chose (using Tailwind CSS) and the Stacks index.
Because we use scaffolds when generating our resources, we get the “basics” of a CRUD app, which allows you to create, read, update, and destroy each model we’ve added so far minus users.
Next, let’s update the resource lines to align more with our application architecture. We’ll nest products within stacks .
# config/routes.rb
Rails.application.routes.draw do
  resources :brands
  resources :stacks do
    resources :products
  end
  #...
end
Clean up the scaffolds
With scaffolds comes some unnecessary fluff that we can tighten up and remove. An example of this is the user_id input on the new stack form and the .jbuilder files and response types in the controllers.
When done, there should be no comments in the controllers and id related attributes in the views.
Authentication strategy
Rails UI supports Devise by default, and there are pre-designed authentication views. With that work already out of the way for this app, I’d like to require a user to be authenticated to manipulate data related to a Stack . We will follow suit with the other models soon enough.
Here’s my updated stacks_controller.rb file.
# app/controllers/stacks_controller.rb

class StacksController < ApplicationController
  before_action :authenticate_user!, except: %i[ index show ]
  before_action :set_stack, only: %i[ show edit update destroy ]

  def index
    @stacks = Stack.all
  end

  def show
  end

  def new
    @stack = Stack.new
  end

  def edit
  end

  def create
    @stack = Stack.new(stack_params)
    @stack.user = current_user

    if @stack.save
      redirect_to stack_url(@stack), notice: "Stack was successfully created."
    else
      render :new, status: :unprocessable_entity
    end
  end

  def update
    if @stack.update(stack_params)
      redirect_to stack_url(@stack), notice: "Stack was successfully updated."
    else
      render :edit, status: :unprocessable_entity
    end
  end

  def destroy
    @stack.destroy!
    redirect_to stacks_url, notice: "Stack was successfully destroyed."
  end

  private
    def set_stack
      @stack = Stack.find(params[:id])
    end

    def stack_params
      params.require(:stack).permit(:title)
    end
end
Besides cleaning the file, I added a before_action called :authenticate_user. This is built into the Devise gem and requires a session to bypass. If a user isn’t logged in, they are redirected to the form to do so. You can declare which actions in the controller this applies to. In this case, we want it to apply to everything except the index and show routes.
On top of the new before action, I added some extended logic to assign the current user to a stack inside the create action. That way, we will know who created it based on their user_id.
So it's extra evident the user_id field was generated previously when we first developed the Stack resource. You can check your schema.rb file to see it on the stacks table.
The line user:references worked for us on the generator command.
Here’s an excerpt from my schema file for reference.
create_table "stacks", force: :cascade do |t|
    t.string "title"
    t.integer "user_id", null: false
    t.datetime "created_at", null: false
    t.datetime "updated_at", null: false
    t.index ["user_id"], name: "index_stacks_on_user_id"
  end
If you haven’t already, sign up for an account at localhost:3000/users/sign_up . Because we are working locally, you can use a fake email and password. I'd suggest something super easy to remember, for speed's sake.
Try creating a Stack
Right now, a Stack by itself is underwhelming. Let’s create a stack and ensure the user data saves correctly. Then, we can proceed to the Product model.
I created one called Andy’s Stack, and it worked!
To verify it saved my user data, we can leverage rails console
rails console
Then type
Stack.last
That should then output our first stack
irb(main):001> Stack.last
  Stack Load (0.1ms)  SELECT "stacks".* FROM "stacks" ORDER BY "stacks"."id" DESC LIMIT ? [["LIMIT", 1]]
=>
#<Stack:0x00000001064f4c58
 id: 1,
 title: "Andy's Stack",
 user_id: 1,
 created_at: Mon, 27 Nov 2023 21:25:35.307793000 UTC +00:00,
 updated_at: Mon, 27 Nov 2023 21:25:35.307793000 UTC +00:00>
Note the user_id column has the value 1. This gives us a clue that our logic is working!
For bonus points, you could write if you wanted to see information about the user assigned to the stack.
Stack.last.user
 Stack Load (0.1ms)  SELECT "stacks".* FROM "stacks" ORDER BY "stacks"."id" DESC LIMIT ? [["LIMIT", 1]]
  User Load (0.2ms)  SELECT "users".* FROM "users" WHERE "users"."id" = ? LIMIT ? [["id", 1], ["LIMIT", 1]]
=> #<User id: 1, email: "[email protected]", first_name: nil, last_name: nil, admin: false, created_at: "2023-11-27 21:19:52.662926000 +0000", updated_at: "2023-11-27 21:19:52.662926000 +0000">
This works fine now, but it won’t be as accurate as your data scales. You might need to be more explicit. For example:
stack = Stack.find(340)
Products
The Product model is where a single supplement resides. A product should be able to be a part of any user's stack. We’ll want to make sure a product doesn't already exist in the database before adding it.
My goal for this Let’s Build series is to append the attributes below dynamically. We’ll use a bit of web scrapping to do this along with Nokogiri, a super cool ruby gem. A user needs to supply a link to the product page on Amazon, and the app will parse the rest to the best of its ability.
We’ll add more granular details for the product, including:
titleasin(amazon standard identification number)- I chose Amazon since it’s the most prominent place to shop (in the States). You could integrate multiple merchants eventually and include various links to those. If you were to do various merchants, it might make sense to make a new model so it’s additional criteria a user could filter products/stacks by.
description- Brief description of the product. This might include ingredients or something.
link- A link where the user purchased it originally
price- The original purchase price as a decimal
brand_id- We can provide more accessible filtering logic with the
Brandmodel coming up so users can find products and stacks that might match their preferences.
- We can provide more accessible filtering logic with the
Authentication strategy for products
Much like stacks, I want to require a user session to manipulate the data related to a product. We’ll add more logic to allow only the user who created the product in the first place permissions to do so.
Here’s the updated controller.
class ProductsController < ApplicationController
  before_action :authenticate_user!, except: %i[ index show ]
  before_action :set_product, only: %i[ show edit update destroy ]

  def index
    @products = Product.all
  end

  def show
  end

  def new
    @product = Product.new
  end

  def edit
  end

  def create
    @product = Product.new(product_params)
    if @product.save
      redirect_to product_url(@product), notice: "Product was successfully created."
    else
      render :new, status: :unprocessable_entity
    end
  end

  def update
    if @product.update(product_params)
      redirect_to product_url(@product), notice: "Product was successfully updated."
    else
      render :edit, status: :unprocessable_entity
    end
  end

  def destroy
    @product.destroy!

    redirect_to products_url, notice: "Product was successfully destroyed."
  end

  private
    def set_product
      @product = Product.find(params[:id])
    end

    def product_params
      params.require(:product).permit(:title, :description, :link, :asin, :price, :brand_id)
    end
end
Besides cleaning up the logic from the scaffold, we added a new line right after the class declaration authenticate_user! Much like the stacks_controller.rb file.
Update the product form
I want the “Add product” form to be straightforward. You pass a URL to the product on Amazon, and the app goes and fetches data and creates the product. Our form becomes quite simple then.
<!-- app/views/products/_form.html.erb -->

<%= form_with(model: [@stack, product]) do |form| %> <%= render
"shared/error_messages", resource: form.object %>

<h3 class="font-normal text-lg mb-6">
  Provide the link to the Amazon product, and we'll do the rest.
</h3>

<div class="form-group">
  <%= form.label :link, "Amazon link", class: "form-label" %> <%=
  form.text_field :link, class: "form-input", placeholder:
  "https://www.amazon.com/OPTIMUM-NUTRITION-STANDARD-Naturally-Flavored/dp/B00QQA0H3S/"
  %>

  <div class="prose prose-sm max-w-full pt-3">
    <p>
      Example link:
      <code
        >https://www.amazon.com/OPTIMUM-NUTRITION-STANDARD-Naturally-Flavored/dp/B00QQA0H3S/</code
      >
    </p>
  </div>
</div>

<%= form.submit "Add product", class: "btn btn-primary btn-lg" %> <% end %>
Editing a product
Even though products will be created dynamically, we want to give users the ability to change the details as necessary. I’ll make a new form partial in app/views/products called _edit_form.html.erb .
This form will have all the criteria of a product
<%= form_with(model: [@stack, product]) do |form| %> <%= render
"shared/error_messages", resource: form.object %>

<h3 class="font-normal text-lg mb-6">
  Provide the link to the Amazon product and we'll do the rest.
</h3>

<div class="form-group">
  <%= form.label :thumbnail, class: "form-label" %> <%= form.file_field
  :thumbnail, class: "form-file-input" %> <% if form.object.thumbnail.attached?
  %>
  <div class="my-2">
    <%= image_tag product.thumbnail, class: "w-32 h-auto" %> <%= link_to "Remove
    Thumbnail", remove_thumbnail_stack_product_path(@stack, product), class:
    "btn btn-link" %>
  </div>
  <% end %>
</div>

<div class="form-group">
  <%= form.label :title, class: "form-label" %> <%= form.text_field :title,
  class: "form-input" %>
</div>

<div class="form-group">
  <%= form.label :price, class: "form-label" %> <%= form.number_field :price,
  step: "0.01", class: "form-input" %>
</div>

<div class="form-group">
  <%= form.label :description, class: "form-label" %> <%= form.text_area
  :description, class: "form-input min-h-[220px]" %>
</div>

<div class="form-group">
  <%= form.label :asin, class: "form-label" %> <%= form.text_field :asin, class:
  "form-input" %>
</div>

<div class="form-group">
  <%= form.label :brand_id, "Brand", class: "form-label" %> <%=
  form.collection_select :brand_id, Brand.all, :id, :name, { prompt: "Select
  one" }, {class: "form-select"} %>
</div>

<div class="form-group">
  <%= form.label :link, "Amazon link", class: "form-label" %> <%=
  form.text_field :link, class: "form-input", placeholder:
  "https://www.amazon.com/OPTIMUM-NUTRITION-STANDARD-Naturally-Flavored/dp/B00QQA0H3S/"
  %>
  <div class="prose prose-sm max-w-full pt-3">
    <p>
      Example link:
      <code
        >https://www.amazon.com/OPTIMUM-NUTRITION-STANDARD-Naturally-Flavored/dp/B00QQA0H3S/</code
      >
    </p>
  </div>
</div>

<%= form.submit "Add product", class: "btn btn-primary btn-lg" %> <% end %>
Removing a product thumbnail
For exercise, I added a link to remove an attachment if it’s present on a product. We first check for its existence and display it if it does exist. The link to remove it is a new endpoint added to our controller and routing to simplify it.
# config/routes.rb
resources :stacks do
  resources :products do
    get 'remove_thumbnail', on: :member
  end
end
Here’s my controller after updating to match the new routing structure and additional end point to remove a thumbnail.
# app/controllers/products_controller.rb
class ProductsController < ApplicationController
  before_action :authenticate_user!, except: %i[ index show ]
  before_action :set_product, only: %i[ show edit update destroy remove_thumbnail ]
  before_action :set_stack

  def index
    @products = Product.all
  end

  def show
  end

  def new
    @product = Product.new
  end

  def edit
  end

  def create
    # TODO
  end

  def update
    if @product.update(product_params)
      redirect_to stack_product_url(@stack, @product), notice: "Product was successfully updated."
    else
      render :edit, status: :unprocessable_entity
    end
  end

  def remove_thumbnail
    @product.thumbnail.purge

    redirect_to stack_product_url(@stack, @product), notice: 'Thumbnail removed successfully.'
  end

  def destroy
    @product.destroy!

    redirect_to stack_url(@stack), notice: "Product was successfully destroyed."
  end

  private
    def set_stack
      @stack = Stack.find(params[:stack_id])
    end

    def set_product
      @product = Product.find(params[:id])
    end

    def product_params
      params.require(:product).permit(:title, :description, :link, :asin, :price, :brand_id)
    end
end
ActiveStorage has a built-in purge method we can leverage to remove the attachment easily. I'll do a simple redirect back to the product after removing it.
Creating a product dynamically
I don’t believe I’ve covered web scraping this blog before. It’s a bit of a brittle way to get data from other sites for your site. Most websites frown on scraping data, so use this at your discretion. If you get in trouble, neither Web-Crunch.com nor I can be held responsible.
With that disclaimer out of the way, let’s create a new concern we can use throughout the app. This type of thing is a little taxing, so I want to make a separate module to handle the logic and a background job for queuing up the processes as they transpire. Putting this in a queue frees up your app’s resources and allows the end user to continue navigating without waiting. All that being said, since the process takes a little time, a user needs to be told what’s happening while they wait.
Parsing data automatically
We’ll make products a bit more dynamic with the help of Nokogiri. I want to capture a thumbnail of the product, among other things, once it’s created, if possible. We can inspect elements on a given product page and look for unique class names or IDs. Ideally, they are present for easier access via Nokogiri.
For now, to prototype this, let’s make a new ruby module (a.k.a. a concern) inside the app/models/concerns folder.
Below is the basic module structure. You could extend this to include new sources other than Amazon, depending on your needs and sources.
# app/models/concerns/product_parser.rb
module ProductParser
  module Amazon
  end
end
User agents
We need to randomize our user agent when accessing the URL to get past some of Amazon's guards for another type of scrapper. With the help of ChatGPT and Google, I found a large array we can utilize.
# app/models/concerns/product_parser.rb
module ProductParser
  require 'open-uri'

  COMMON_USER_AGENTS = ['Mozilla/5.0 (Windows NT 6.1; WOW64) AppleWebKit/537.36 (KHTML, like Gecko) Chrome/54.0.2840.71 Safari/537.36','Mozilla/5.0 (Windows NT 10.0; WOW64) AppleWebKit/537.36 (KHTML, like Gecko) Chrome/54.0.2840.71 Safari/537.36','Mozilla/5.0 (Windows NT 10.0; WOW64; rv:49.0) Gecko/20100101 Firefox/49.0','Mozilla/5.0 (Macintosh; Intel Mac OS X 10_11_6) AppleWebKit/537.36 (KHTML, like Gecko) Chrome/54.0.2840.71 Safari/537.36']

  def self.parse_doc(url)
    URI.open(url, 'User-Agent' => COMMON_USER_AGENTS.sample) { |f| Nokogiri::HTML.parse(f) }
  end
end
Parsing Logic 101
That file turns into something like this with an internal parse_doc method. It accepts a URL. With the help of the open-uri library in Ruby, we can fetch it as a random user agent. Then, loop through the hash returned as parse the HTML using Nokogiri.
Think of this process as Ruby/Nokogiri visiting the URL and scanning the DOM elements of the page. From there, we traverse a little deeper to find specific aspects of the data we are after.
This process is, without a doubt, error-prone and brittle. You’re at the mercy of Amazon updating their HTML or CSS classes, so a routine check to ensure the page is scraping correctly would be wise. Tests can solve this, which I’ll do coming up.
If they aren't present, I’ll update the parse with elements and conditional logic. Additionally, the module will create a new product using the attributes we save. Here’s my final parser file.
include ActionView::Helpers::SanitizeHelper

module ProductParser
  require 'open-uri'

  COMMON_USER_AGENTS = ['Mozilla/5.0 (Windows NT 6.1; WOW64) AppleWebKit/537.36 (KHTML, like Gecko) Chrome/54.0.2840.71 Safari/537.36','Mozilla/5.0 (Windows NT 10.0; WOW64) AppleWebKit/537.36 (KHTML, like Gecko) Chrome/54.0.2840.71 Safari/537.36','Mozilla/5.0 (Windows NT 10.0; WOW64; rv:49.0) Gecko/20100101 Firefox/49.0','Mozilla/5.0 (Macintosh; Intel Mac OS X 10_11_6) AppleWebKit/537.36 (KHTML, like Gecko) Chrome/54.0.2840.71 Safari/537.36']

  def self.parse_doc(url)
    URI.open(url, 'User-Agent' => COMMON_USER_AGENTS.sample) { |f| Nokogiri::HTML.parse(f) }
  end

  module Amazon
    def self.get_attributes(url)
      attributes = {}
      doc = ProductParser.parse_doc(url)

      # title
      title_element = doc.at('#productTitle')

      if title_element
        title_string = title_element.inner_html.strip
        attributes[:title] = title_string
      end

      # description
      description_element = doc.at('#productDescription')

      if description_element
        dirty_description = description_element.inner_html
        clean_description = sanitize(dirty_description, tags: %w[h3 span p])
        attributes[:description] = clean_description.strip
      end

      # price
      price_1_element = doc.at('#corePrice_feature_div .a-offscreen')
      price_2_element = doc.at('.header-price span')

      if price_1_element
        price_1_string = price_1_element.inner_html
        price_1_decimal = price_1_string.gsub(/[^0-9.]/, '').to_d
        attributes[:price] = price_1_decimal
      elsif price_2_element
        price_2_string = price_2_element.inner_html
        price_2_decimal = price_2_string.gsub(/[^0-9.]/, '').to_d
        attributes[:price] = price_2_decimal
      else
        attributes[:price] = nil
      end

      # brand
      brand_element = doc.at('.po-brand .a-span9 span')
      if brand_element
        brand_string = brand_element.inner_html
        brand_name = brand_string.strip
        brand = Brand.find_or_create_by!(name: brand_name)
        attributes[:brand] = brand
      end

      # thumbnail
      thumbnail_element = doc.at('#landingImage')
      thumbnail_url = thumbnail_element['src'] if thumbnail_element

      if thumbnail_url
        thumbnail = URI.open(thumbnail_url)
        attributes[:thumbnail] = ActiveStorage::Blob.create_and_upload!(io: thumbnail, filename: "thumbnail_#{Time.now.to_i}")
      end

      # asin
      asin = url.match(%r{dp/([^/]+)/})&.captures&.first
      attributes[:asin] = asin

      return attributes
    end

    def self.save_to_product(url, product)
       begin
        attributes = get_attributes(url)
        product.update(attributes)
      rescue StandardError => e
        Rails.logger.error("Error in save_to_product: #{e.message}")
        Rails.logger.error(e.backtrace.join("\n"))
      end
    end
  end
end
In this file, we find and collect the following bits of data. It’s stored in an attributes variable.
titledescriptionprice_1price_2- A backup price on different versions of the product pagebrand- Starts as a string, and we take that string and either create a new product or find an existing one in our database to assign.thumbnail- Pull the thumbnail from the doc and attach it via ActiveStorage.asin- We do some Ruby magic and use a Regular expression pattern to extract the ASIN from the url.
So far, we’ve only parsed the data. We haven’t saved a new product. We’ll do that coming up in our ProductsController and a background job. For now, I’ll note the method in the parser called save_to_product that accepts the url and product instances. This will make more sense in a second.
Creating a product for real
If you remember our new product form, you will recall it’s a simple field and a submit button. The end user adds a link from Amazon to the field and clicks Create Product. That brings us to our next step. By design/convention, the form on /stacks/:stack_id/products/new will leverage a POST HTTP response to our server. Doing so sends a request with the link parameter. We'll take that and amend our create action in the controller.
class ProductsController < ApplicationController
  #...
   def create
    link = params[:product][:link].strip
    ProductImportJob.perform_later(link, @stack.id)
    redirect_to stack_path(@stack), notice: "Product is being created, sit tight!"
  end
  #...
end
Here we go “anti” conventional a bit and introduce a few new steps in the chain to create a product dynamically.
Create a product import background job
The ProductImportJob class is in the create action. Let's create that quickly:
rails g job ProductImport
That makes a new file app/jobs/product_import_job.rb
In this file, we’ll leverage the new parser to put the taxing processes in a queuing service, which in return won’t tax our app’s resources and also gives the end user a better experience.
Add and configure sidekiq
I prefer to use Sidekiq for my background queuing service. There are a few configuration steps to get out of the way before we do.
Add sidekiq to your Gemfile or run the following:
bundle add sidekiq
Head to config/application.rb and add the following to your app. Here's my file:
require_relative "boot"

require "rails/all"

# Require the gems listed in Gemfile, including any gems
# you've limited to :test, :development, or :production.
Bundler.require(*Rails.groups)

module Supstacker
  class Application < Rails::Application
    config.generators do |g|
      g.template_engine :railsui
      g.fallbacks[:railsui] = :erb
    end

    config.to_prepare do
      Devise::Mailer.layout "mailer"
    end

    config.active_job.queue_adapter = :sidekiq # ADD THIS LINE

    # Initialize configuration defaults for originally generated Rails version.
    config.load_defaults 7.1

    # Please, add to the `ignore` list any other `lib` subdirectories that do
    # not contain `.rb` files, or that should not be reloaded or eager loaded.
    # Common ones are `templates`, `generators`, or `middleware`, for example.
    config.autoload_lib(ignore: %w(assets tasks))

    # Configuration for the application, engines, and railties goes here.
    #
    # These settings can be overridden in specific environments using the files
    # in config/environments, which are processed later.
    #
    # config.time_zone = "Central Time (US & Canada)"
    # config.eager_load_paths << Rails.root.join("extras")
  end
end
If you have a Procfile.dev file, add the following lines (with Rails UI, you should have this).
# Procfile.dev
web: bin/rails server -p 3000
js: yarn build --watch
css: yarn build:css --watch
worker: bundle exec sidekiq # add this one
Finally, I like to use the UI reasonably often, so I added the following to my routes file.
# config/routes.rb
Rails.application.routes.draw do
  if defined?(Sidekiq)
    require "sidekiq/web"
    mount Sidekiq::Web => "/sidekiq"
  end
end
Restart your server bin/dev with that out of the way.
Add the product job import logic
Our logic in the job is pretty simple.
# app/jobs/product_import_job.rb

class ProductImportJob < ApplicationJob
  queue_as :default

#  after_perform do |job|
    # Send notification if you want
#  end

  def perform(link, stack_id)
    stack = Stack.find(stack_id)

    # Check if the product already exists based on the link
    existing_product = Product.find_by(link: link)

    if existing_product
      # If the product exists, associate it with the stack
      existing_product.stacks << stack
    else
      # If the product doesn't exist, create a new one
      product = Product.new(link: link)
      product.stacks << stack
      ProductParser::Amazon.save_to_product(link, product)
    end
  end
end
When performing the job, we pass the link and the stack_id as arguments. Because products can belong to other stacks, it makes sense to rinse and reuse those if we have them in the database. Instead of creating a duplicate product, we’ll assign the existing one to the respective stack.
See the parser at work? If the product doesn’t exist, we offload the work to the parser and pass the link and product to it using the save_to_product method I called attention to earlier.
That then fetches all the attributes, assigns them to the product instance, and saves the product to the database.
After completing the job, you could use fancy logic to refresh the page with ActionCable. I left this out for the sake of time but invite you to extend it. Note the comment in the job:
class ProductImportJob < ApplicationJob
#  after_perform do |job|
    # Send notification if you want
#  end
end
This callback method gets called where you can do something further. I’ll often send emails or trigger notifications here.
Verify with a test
To actively test our parser, we should add a test to ensure it returns data. This will help automate our scrapping logic so we know if it fails, we can make more immediate improvements. Amazon will no doubt update its product pages. It’s not a matter of if but when.
Before we add the test, we need to update our users.yml fixture file. This is so we can leverage devise in our tests. You can add whatever dummy content you want here. I said the following.
# test/fixtures/users.yml
one:
  first_name: John
  last_name: Doe
  email: [email protected]
two:
  first_name: Jane
  last_name: Doe
  email: [email protected]
I’ll just put a new test in test/ directly called product_parser_test.rb for the parser test. Here's my file.
We require a logged-in user to add a product, so we need to use the devise sign_in to test an authenticated user. Be sure to include the line include Devise::Test::IntegrationHelpers
require "test_helper"

class ProductParserTest < ActiveSupport::TestCase
  include ProductParser
  include Devise::Test::IntegrationHelpers

  def setup
    sign_in(:one)
    @amazon_url = "https://www.amazon.com/BSN-XPLODE-Pre-Workout-Supplement-Beta-Alanine/dp/B007XRVL2Y/"
  end

  def test_parse_doc
    doc = ProductParser.parse_doc(@amazon_url)
    assert_instance_of Nokogiri::HTML::Document, doc
  end

  def test_amazon_get_attributes
    attributes = ProductParser::Amazon.get_attributes(@amazon_url)

    assert_not_nil attributes[:title]
    assert_not_nil attributes[:description]
    assert_not_nil attributes[:price]
    assert_not_nil attributes[:brand]
    assert_not_nil attributes[:thumbnail]
    assert_not_nil attributes[:asin]
  end
end
Then we can try it out by running:
rails test test/product_parser_test.rb
If all goes well, you’ll see two green tests. If not, check the logs and debug :)
rails test test/product_parser_test.rb

Running 2 tests in a single process (parallelization threshold is 50)
Run options: --seed 36475

# Running:

..

Finished in 3.899943s, 0.5128 runs/s, 1.7949 assertions/s.
2 runs, 7 assertions, 0 failures, 0 errors, 0 skips
Trying it all out
Here’s a quick video of me running through the process on my local machine. One thing to note is that once you submit the form, there’s no automatic page refresh to show the new product.
Automatically refresh the project list with Turbo streams
I wasn’t going to include this due to time originally, but it’s driving me up the wall, so let’s have a Stack list of products update automatically when the product import job is complete.
Stack Show view
I’ve updated my views a bit to help make turbo logic easier. Instead of rendering a new form over on /stack/1/products/new, I decided to embed that form right on the Stack show view to simplify things. Here is the updates stack show view:
<!-- app/views/stacks/show.html.erb-->

<div class="max-w-3xl mx-auto px-4 my-16">
  <div class="pb-6">
    <nav aria-label="breadcrumb" class="my-6 font-medium flex text-slate-500 dark:text-slate-200 text-sm">
      <ol class="flex flex-wrap items-center space-x-3">
        <li>
          <%= link_to "Stacks", stacks_path, class: "hover:underline hover:text-slate-600 dark:hover:text-slate-400" %>
        </li>
        <li class="flex space-x-3">
          <div class="flex items-center">
            <span class="text-slate-300 dark:text-slate-500">/</span>
          </div>
          <span class="text-indigo-600 dark:text-indigo-500" aria-current="page">
            <%= @stack.title %>
          </span>
        </li>
      </ol>
    </nav>

    <h1 class="h3 mb-6"><%= @stack.title %></h1>
    <div class="flex items-center gap-4 py-3 px-2 border-y">
      <div class="flex-1 flex items-center gap-4">
        <time class="text-slate-600 dark:text-slate-400 text-xs" datetime="<%= @stack.created_at.to_formatted_s(:long) %>">Created <%= time_ago_in_words(@stack.created_at) + " ago" %></time>
      </div>

      <% if current_user_stack?(@stack) %>
        <%= link_to "Edit", edit_stack_path(@stack), class: "btn btn-light" %>
      <% else %>
        <%= link_to "Create your own stack", new_user_registration_path, class: "btn btn-primary" %>
      <% end %>

    </div>
  </div>

  <div class="p-6 border bg-indigo-50/20 border-indigo-600/50 rounded-2xl shadow-sm mb-6">
    <h3 class="font-semibold text-xl tracking-tight mb-3">Add a product</h3>
    <%= render "products/form", product: Product.new %>
  </div>

  <%= turbo_frame_tag "products_count_#{@stack.id}" do %>
    <%= render "stack_product_count", stack: @stack %>
  <% end %>

  <%= turbo_stream_from @stack %>

  <%= turbo_frame_tag "product_list_#{@stack.id}" do %>
    <%= render "product_list", stack: @stack %>
  <% end %>
</div>
Towards the bottom, we render the new product form. Below that is the magic that makes turbo stream updates to our view.
First, we need this line:
<%= turbo_stream_from @stack %>
This one-liner is responsible for listening to websocket updates as they transpire. We’ll add some logic to our background job to “trigger” the upcoming update.
Below that line is our new product list, which I extracted to a partial.
<%= turbo_frame_tag "product_list_#{@stack.id}" do %>
    <%= render "product_list", stack: @stack %>
  <% end %>
That partial is located in app/stacks/product_list.html.erb
<!-- app/stacks/product_list.html.erb -->

<% stack.products.each do |product| %>
  <%= render "products/product_slim", stack: stack, product: product %>
<% end %>
Finally, inside the products/product_slim.html.erb partial is the slender details of a product.
<!-- app/views/products/_product_slim.html.erb -->

<li class="py-3 flex items-center gap-4">
  <% if product.thumbnail.attached? %>
    <%= link_to stack_product_path(stack, product), class: "block" do %>
      <%= image_tag url_for(product.thumbnail), class: "w-12 h-12 p-1 object-contain border rounded", alt: product.title %>
    <% end %>
  <% end %>

  <div class="flex items-start justify-between gap-4 flex-1">
    <div class="flex-1">
      <%= link_to stack_product_path(stack, product), target: :_top, class: "group" do %>
        <h4 class="font-normal text-sm group-hover:text-indigo-600"><%= truncate(product.title, length: 75) %></h4>
        <p class="font-medium text-sm"><%= number_to_currency(product.price) %></p>
      <% end %>
    </div>
    <div class="flex justify-end">
      <%= link_to "Buy on Amazon", product.link, target: :_blank, class: "btn btn-dark btn-sm", target: :_top %>
    </div>
  </div>
</li>
Then, one more for brownie points is partial to update the count in real time with turbo, too.
<!-- app/stacks/_stack_product_count.html.erb -->
<h3 class="pt-6 h4"><%= pluralize(stack.products.size, 'Product') %></h3>
Product show
The product shown is another page showing more details of the product. It’s nothing special, but it gets the job done for now. Expand on the design as you want.
<!-- app/views/product/show.html.erb-->
<div class="max-w-3xl mx-auto px-4 my-16">
  <div class="pb-6 border-b">
    <nav aria-label="breadcrumb" class="my-6 font-medium flex text-slate-500 dark:text-slate-200 text-sm">
      <ol class="flex flex-wrap items-center space-x-3">
        <li>
          <%= link_to @stack.title, stack_path(@stack), class: "hover:underline hover:text-slate-600 dark:hover:text-slate-400" %>
        </li>
        <li class="flex space-x-3">
          <div class="flex items-center">
            <span class="text-slate-300 dark:text-slate-500">/</span>
          </div>
          <span class="text-indigo-600 dark:text-indigo-500" aria-current="page">
            <%= truncate(@product.title, length: 60) %>
          </span>
        </li>
      </ol>
    </nav>
    <div class="flex items-start justify-between gap-4">
      <h1 class="h4 flex-1"><%= @product.title %></h1>
      <% if current_user_stack?(@stack) %>
        <%= link_to "Edit", edit_stack_product_path(@stack, @product), class: "btn btn-light" %>
      <% end %>
    </div>
  </div>
  <%= render @product %>
</div>
Then the _product.html.erb partial
<!-- app/views/products/_product.html.erb-->

<article id="<%= dom_id product %>">
  <div class="flex items-start justify-between py-6">
    <% if product.thumbnail.attached? %>
      <%= image_tag product.thumbnail %>
    <% end %>

    <div class="flex flex-col items-end">
      <p class="text-3xl font-bold pb-3"><%= number_to_currency(product.price) %></p>
      <%= link_to "Buy on Amazon", product.link, target: :_blank, class: "btn btn-dark" %>
    </div>
  </div>

  <div class="prose prose-indigo pt-4">
    <p class="mb-0 font-semibold">
      Description
    </p>
    <p class="my-0 prose">
      <%= simple_format product.description %>
    </p>
    <p class="mb-0 font-semibold">
      Brand
    </p>
    <p class="my-0">
      <%= product.brand.name %>
    </p>

    <p class="mb-0 font-semibold">
      ASIN
    </p>
    <p class="my-0">
      <%= product.asin %>
    </p>

    <time class="text-slate-600 dark:text-slate-400 text-xs mt-2" datetime="<%= product.created_at.to_formatted_s(:long) %>">Created <%= time_ago_in_words(product.created_at) + " ago" %></time>
  </div>
</article>
Update the product import job to include stream trigger
This approach aims to make the product append to the Stack product list automatically following the import (when the background job is completed). This solves the page refresh we had to do manually before. Instead of appending a new partial, we’ll re-render the whole list.
class ProductImportJob < ApplicationJob
  queue_as :default

  def perform(link, stack_id)
    stack = Stack.find(stack_id)
    imported_product = nil
    # check if the product already exists based on the link
    existing_product = Product.find_by(link: link)

    if existing_product
      imported_product = existing_product.stacks << stack
    else
      # If the product doesn't exist, create a new one
      product = Product.new(link: link)
      product.stacks << stack
      imported_product = ProductParser::Amazon.save_to_product(link, product)
    end

    broadcast_turbo_stream(stack, imported_product)
  end

  private

  def broadcast_turbo_stream(stack, product)
    Turbo::StreamsChannel.broadcast_replace_to(
      stack,
      target: "product_list_#{stack.id}",
      partial: "stacks/product_list",
      locals: { stack: stack }
    )

    Turbo::StreamsChannel.broadcast_replace_to(
      stack,
      target: "products_count_#{stack.id}",
      partial: "stacks/stack_product_count",
      locals: { stack: stack }
    )
  end
end
The new broadcast_turbo_steam method gets a stack and product instance. We then call the Turbo::StreamsChannel.broadcast_replace_to method passing the object we are streaming updates to (remember the line <% turbo_stream_from @stack %> ? Yeah, that one). We'll target our product list by it's unique ID and pass the partial we made through so the whole list updates when a new product is added.
Quite the feat of work to reduce the need to refresh the page, but the results are fantastic!
Here’s a quick video of the new experience:
Add a share link to stacks
We have most of the functionality we need to call this an MVP. We’ll need a way for users to share their stacks easily, so let's add that. When we generated a stack, we added a column called share_link.
When a new stack is created, we could prefill that link with a unique ID that’s a short URL. Let’s add that logic to the model as a callback function.
class Stack < ApplicationRecord
  belongs_to :user
  has_many :product_stacks
  has_many :products, through: :product_stacks

  before_create :generate_unique_share_link

  def generate_unique_share_link
    # Loop until a unique share link is generated
    loop do
      self.share_link = generate_random_string
      break unless Stack.exists?(share_link: share_link)
    end
  end

  def generate_random_string
    SecureRandom.urlsafe_base64(6)
  end
end
When a new Stack is created, we'll add a share_link string randomized by default. We'll check to ensure it doesn't already exist so we know it's unique. Using the loop block, we can provide this.
Create a new Stack if you're following along and fire up your rails console.
rails console

irb> Stack.last
#<Stack:0x000000010a89cd20
 id: 2,
 title: "John's Stack",
 share_link: "_KStndzM",
 user_id: 1,
 created_at: Thu, 30 Nov 2023 22:50:00.456748000 UTC +00:00,
 updated_at: Thu, 30 Nov 2023 22:50:00.456748000 UTC +00:00>
irb(main):003>
Notice that the share_link column has a short link identifier we can now leverage.
Update Stack routing
We need a way to accent the new share link as a param in our routing, so lets update the stack resources:
# config/routes.rb

resources :stacks, param: :share_link do
  resources :products do
    get 'remove_thumbnail', on: :member
  end
end
Here’s the full controller:
# app/controllers/stacks_controller.rb
class StacksController < ApplicationController
  before_action :authenticate_user!, except: %i[ index show ]
  before_action :set_stack, only: %i[ show edit update destroy ]

  def index
    @stacks = Stack.all
  end

  def show
  end

  def new
    @stack = Stack.new
  end

  def edit
  end

  def create
    @stack = Stack.new(stack_params)
    @stack.user = current_user

    if @stack.save
      redirect_to stack_url(@stack), notice: "Stack was successfully created."
    else
      render :new, status: :unprocessable_entity
    end
  end

  def update
    if @stack.update(stack_params)
      redirect_to stack_url(@stack), notice: "Stack was successfully updated."
    else
      render :edit, status: :unprocessable_entity
    end
  end

  def destroy
    @stack.destroy!
    redirect_to stacks_url, notice: "Stack was successfully destroyed."
  end

  private
    def set_stack
      @stack = Stack.find_by(share_link: params[:share_link]) || Stack.find_by(id: params[:share_link])
    end

    def stack_params
      params.require(:stack).permit(:title)
    end
end
Inside the private method at the bottom of the file, the set_stack now looks by id and share_link and pulls up the same page.
We can try this manually. Pull up the string your stack generated for the share_link column and add it to the url localhost:3000/stacks/_KStndzM.
It’s working great!
Make it easy to copy a link
To wrap up this Let’s Build, use Stimulus.js and Clipboard.js to click an icon to copy the share link for easy access.
Create a stimulus controller
rails g stimulus clipboard
Install dependencies:
yarn add clipboard tippy.js
Import the file to your index_controller.js file if Rails doesn't already.
# app/controllers/index_controller.js

import ClipboardController from "./clipboard_controller"
application.register("clipboard", ClipboardController)
Inside the new clipboard_controller.js file, I added the following:
import { Controller } from "@hotwired/stimulus"
import ClipboardJS from "clipboard"
import tippy from "tippy.js"

export default class extends Controller {
  static values = {
    successMessage: String,
    errorMessage: String,
  }

  connect() {
    this.clipboard = new ClipboardJS(this.element)
    this.clipboard.on("success", () => this.tooltip(this.successMessageValue))
    this.clipboard.on("error", () => this.tooltip(this.errorMessageValue))
  }

  tooltip(message) {
    tippy(this.element, {
      content: message,
      showOnCreate: true,
      onHidden: (instance) => {
        instance.destroy()
      },
    })
  }
}
When mounted, This reusable component will display a tooltip with a success or error message if the clipboard instance was copied. We’ll need to supply a url to clipboard.js
I’ll update the Stack show view to have a new button that, when clicked, should copy the share link to the user's clipboard.
<!-- app/views/stacks/show.html.erb-->
<div class="max-w-3xl mx-auto px-4 my-16">
  <div class="pb-6">
    <nav aria-label="breadcrumb" class="my-6 font-medium flex text-slate-500 dark:text-slate-200 text-sm">
      <ol class="flex flex-wrap items-center space-x-3">
        <li>
          <%= link_to "Stacks", stacks_path, class: "hover:underline hover:text-slate-600 dark:hover:text-slate-400" %>
        </li>
        <li class="flex space-x-3">
          <div class="flex items-center">
            <span class="text-slate-300 dark:text-slate-500">/</span>
          </div>
          <span class="text-indigo-600 dark:text-indigo-500" aria-current="page">
            <%= @stack.title %>
          </span>
        </li>
      </ol>
    </nav>

    <h1 class="h3 mb-6"><%= @stack.title %></h1>
    <div class="flex items-center gap-4 py-3 px-2 border-y">
      <div class="flex-1 flex items-center gap-4">

        <button class="btn btn-white rounded-full flex items-center justify-center w-10 h-10 m-0" data-controller="clipboard" data-clipboard-text="<%= stack_url(@stack.share_link) %>">
          <%= icon "link", classes: "w-5 h-5 flex-shrink-0" %>
        </button>

        <time class="text-slate-600 dark:text-slate-400 text-xs" datetime="<%= @stack.created_at.to_formatted_s(:long) %>">Created <%= time_ago_in_words(@stack.created_at) + " ago" %></time>
      </div>

      <% if current_user_stack?(@stack) %>
        <%= link_to "Edit", edit_stack_path(@stack), class: "btn btn-light" %>
      <% else %>
        <%= link_to "Create your own stack", new_user_registration_path, class: "btn btn-primary" %>
      <% end %>

    </div>
  </div>

  <div class="p-6 border bg-indigo-50/20 border-indigo-600/50 rounded-2xl shadow-sm mb-6">
    <h3 class="font-semibold text-xl tracking-tight mb-3">Add a product</h3>
    <%= render "products/form", product: Product.new %>
  </div>

  <%= turbo_frame_tag "products_count_#{@stack.id}" do %>
    <%= render "stack_product_count", stack: @stack %>
  <% end %>

  <%= turbo_stream_from @stack %>

  <%= turbo_frame_tag "product_list_#{@stack.id}" do %>
    <%= render "product_list", stack: @stack %>
  <% end %>
</div>
Now, we can click to copy the URL and visit either the original stack path or the new unique share link. Awesome!
A gotcha
After a quick test, I found a bug in our products_controller.rb. We’re setting the Stack at the bottom in a private method, much like in the stacks_controller.rb . We can copy our updated code to find the Stack like so. Important note: it's updated to stack_share_link in this controller.
# app/controllers/products_controller.rb
class ProductsController < ApplicationController
  #...

  private
    def set_stack
       @stack = Stack.find_by(share_link: params[:stack_share_link]) || Stack.find_by(id: params[:stack_share_link])
    end
end
Conclusion
In conclusion, this Let's Build series focused on creating a product management system that allows users to add products to their stack.
The system utilizes web scraping with Nokogiri to extract data from product pages on Amazon. The product's attributes, such as title, description, price, and brand, are dynamically appended to the system. The authentication strategy ensures that only the user who created the product has permission to manipulate its data.
The system also allows users to edit and remove products, as well as remove product thumbnails.
Creating a product dynamically involves a background job that queues up the scraping process to avoid taxing the app's resources.
The system uses Nokogiri to parse the data from the product page and save it to the database. Tests are implemented to ensure the parser is returning accurate data. The system also includes the functionality to refresh the stack list of products automatically using Turbo streams. Finally, a share link is added to stacks, allowing users to share their stacks with others easily. 🎉
Bonus
I follow a methodology from the Amazon team where you start with a press release for the idea you've decided to build. If that press release is sound, it gives your team more conviction to press forward on a solid foundation. Through grit and perseverance, you can accomplish anything. This guide started with the following press release.
Press release
Today, we're excited to announce the upcoming launch of Supstacker, the ultimate app for supplement enthusiasts! Designed and developed by Andy, a seasoned product designer and developer passionate about making life better through technology.
Supstacker is your go-to destination for sharing and shopping for supplements. Whether you're a fitness enthusiast, health-conscious individual, or just someone looking to boost their well-being, Suptacker has got you covered.
Key Features:
- Create and Share Stacks: With Supstacker, you can easily create lists of your favorite supplements, known as "stacks." Share your stacks with friends, family, or the entire Supstacker community.
- Shop Smart: Find the best deals and top-quality supplements in one place. Supstacker provides product recommendations and pricing information, ensuring you get the most bang for your buck.
Stay tuned for the official launch of Supstacker. We can't wait to help you supercharge your supplement shopping experience. Get ready to stack, shop, and earn with Supstacker!
Please get in touch with Andy Leverenz for press inquiries or more information.
About Supstacker
Supstacker is Andy's brainchild, designed to simplify supplement shopping and empower users to see their friends' stacks, all while enhancing their well-being.
With Supstacker, you can create, share, and shop for supplement stacks.
Useful links:
- Nokogiri
- Stimulus Docs
- Turbo Docs
- Full YouTube playlist of this series
- Hello Rails - A modern course designed to help you start using and understanding Ruby on Rails fast.
- Rails UI - Professionally designed UI components & templates made exclusively for Ruby on Rails.
- Hire me
- More Let's Builds like this one
Categories
Collection
Part of the Let's Build: With Ruby on Rails collection
