
December 26, 2014
•Last updated November 5, 2023
Diving Deep with Smart Objects
Smart Objects are layers within Adobe applications such as Photoshop or Illustrator, that contain data from raster or vector images. These objects preserve an image’s original look and other characteristics so any editing done to the image is nondestructive.
This post will cover what Smart Objects are, what you can do to use the massive power and flexibility they offer, as well as a real-life example of them in use.
Why Use Smart Objects?
With Smart Objects, you can perform modifications to the layer without altering its original form. Scale, rotate, skew, etc... it’s all preserved.
You can also create both vector and raster images using them. Before CS5, anything within Photoshop had to convert to pixels or raster images. Now you can import a Smart Object from Illustrator and it still maintains it’s vector beauty.
Probably the neatest feature, besides the nondestructive editing, is that Smart Objects allow you to edit one copy and any copies that are linked are automatically updated. This is true across files, so long as that link is made. Needless to say, since you can use Smart Objects, you should be using Smart Objects.
How Do I Create a Smart Object?
There are several different ways to create a Smart Object. If you can open a file in Photoshop, you can create a Smart Object.
Open as Smart Object
The first way is to open a file as a Smart Object. If you go to File / Open As Smart Object you will be in business.
[caption id="attachment_429" align="aligncenter" width="788"] File / Open As Smart Object[/caption]
Place an object
Another way is to place a file. By default Photoshop converts any placed file into a Smart Object. This is true for both images and vectors. To place a file go to File / Place within Photoshop.
[caption id="attachment_430" align="aligncenter" width="788"] Place an Object as a Smart Object[/caption]
Quick note: If you’re using Photoshop CC you will notice two options for placing an object. In order for that object to be a Smart Object, you will need to select Place Embedded. Placing via Linked uses a similar method as Adobe InDesign does but that goes beyond the scope of this post.
Convert a Layer To A Smart Object
Converting a layer to a Smart Object is as easy as a few clicks. Just right click or control + click on a mac to reveal a menu of options.
[caption id="attachment_426" align="aligncenter" width="756"] Convert a Layer to a Smart Object[/caption]
Choose Convert To Smart Object and you should notice the layer thumbnail change to include an icon to symbolize that it is indeed a Smart Object now.
[caption id="attachment_433" align="aligncenter" width="800"] Convert To Smart Object icon[/caption]
You can also convert a layer to a Smart Object choosing Layer / Smart Object / Convert to Smart Object
Copy and Paste
Probably the easiest way to get a vector into Photoshop is to copy and paste. Once you paste, a prompt should show asking you how to format the new Smart Object.

You can paste as a Smart Object by default or as pixel, a shape, or path. This method is the simplest way to get vector data from Illustrator to Photoshop.
So as you can see, there are more than enough ways to create a Smart Object. Having these available at your finger tips makes your workflow benefit that much more.
How To Make Use Of Them
I use Photoshop for website design or image manipulation. More often than not I’ll create a high fidelity mockup in Photoshop to complete a website’s design. I won’t design every page of a website but I have found the more I dial in before hitting code the better things end up once development begins.
Smart Objects help me make use of any type of content that is repeatable. Blocks of placeholder text, columns, rows, thumbnails, etc... are great ways to use this great feature.

One particular use case for me is the header and footer area of a website. Usually once these areas are designed they don’t change in appearance on different pages. With that said I’ll create a new photoshop document for both the header and footer with all the layered elements in place. Then I convert those layers and elements into a Smart Object. Finally, I place those smart objects within my main design.
Whenever I need to make a change or revision I only have to update it once as opposed to many times. The change will update everywhere else upon save. How great is that?
Doing this saves so much time and allows your designs to be consistent and efficient in case a change is ever in order.
Going Further
Make A Style Guide
Say you have a project that takes off and turns out to be a large website. You need original designs for a lot of pages but don’t want to spend any more time than you have to. What do you do?
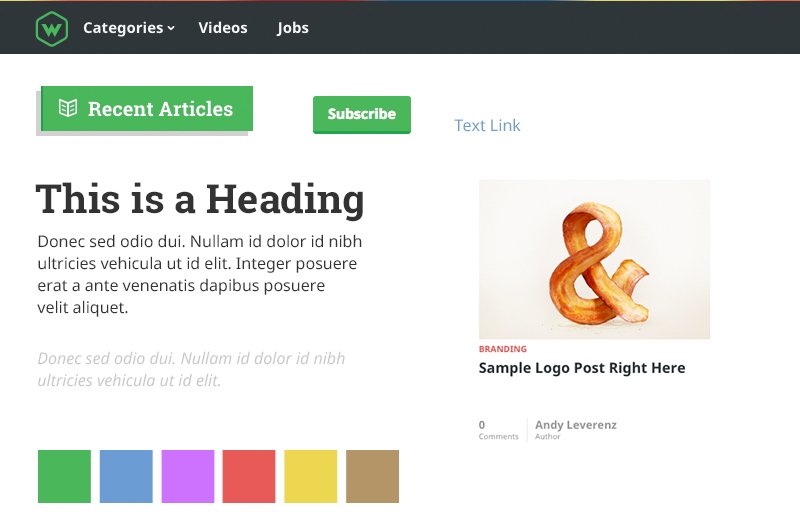
You may have noticed my collection of elements, or what I like to call a style guide, in an image earlier. With the web, repetition is normal and sometimes vital. Elements such as colors, link styles, form styles, and buttons get the same treatment across every page. Only minor differences exist and those are usually something like color variations or placement.
To solve this issue you can make use of Smart Objects by creating a Photoshop document filled with nothing but these repeatable elements. Doing this is a way to define a style guide but also a way to make things move faster and be more efficient within your workflow. After you finish the style guide design you can link your other real designs with these elements. If you needed to update them you could do so from one file rather than each individual file. Pretty cool eh?
Making Use Of Layer Comps and Smart Objects
Most designers I have met either love or hate Layer Comps. I’ll let you be the judge. I personally like them and use them often to keep designs consistent across one Photoshop file. The only major downfall is file size and/or if you get some comps out of sync. Aside from these caveats, the capability of using Smart Objects within Layer Comps now exists and it’s awesome.
By default, Layer Comps save layer visibility, positioning, and appearance data which is all recallable. If you have designs for many pages of an application or a website, Layer Comps make it easy to bring them to life. With the latest update, Smart Objects come into the picture allowing you to provide even more options for your design. Using Smart Objects in Photoshop CC 2014 now allows you to update layer visibility, positioning, and appearance data across all layer comps at once. Finally!
What’s the Catch?
There are a few downsides to Smart Objects but none that should keep you from utilizing them.
Smart Objects increase file size and slow the application down
Your designs are usually spread between more than one file which might not appeal to some
While converting something to a Smart Object is cake, there’s no real easy way to make a Dumb Object (or get your layers or groups back).
Suggestions
If you don’t already use Smart Objects you should start small. You don’t have to make your creative process revolve around the software. Let the software work for you and with you. If you’re not comfortable adopting a new feature like this then plain and simply don’t. If you do adopt this feature you can bet your long list of layers or groups will be better organized.
Experiment with importing Smart Objects and using them across files. Once you get the hang of it I doubt you will turn back to using regular raster images again.
Useful Links and Final Thoughts
While I’ve only scratched the surface on making use of Smart Objects, I know Adobe is doing some great stuff to make these more powerful. With the latest update for Photoshop CC 2014, there are new features dealing with linkage so your designs are cross-file ready. These are all great strides in making Photoshop that much more powerful and easier to work with. Below are some useful links. Some are current and some are older. All deal with Smart Objects.
Do you use Smart Objects in your workflow? Do you still create entire high fidelity designs or just bits and pieces as stated before? Let us know in the comments
